Venetian Hard Enamel vs. English Soft Enamel Dials: Part 3 – The Process of Making Glass Enamel Dials

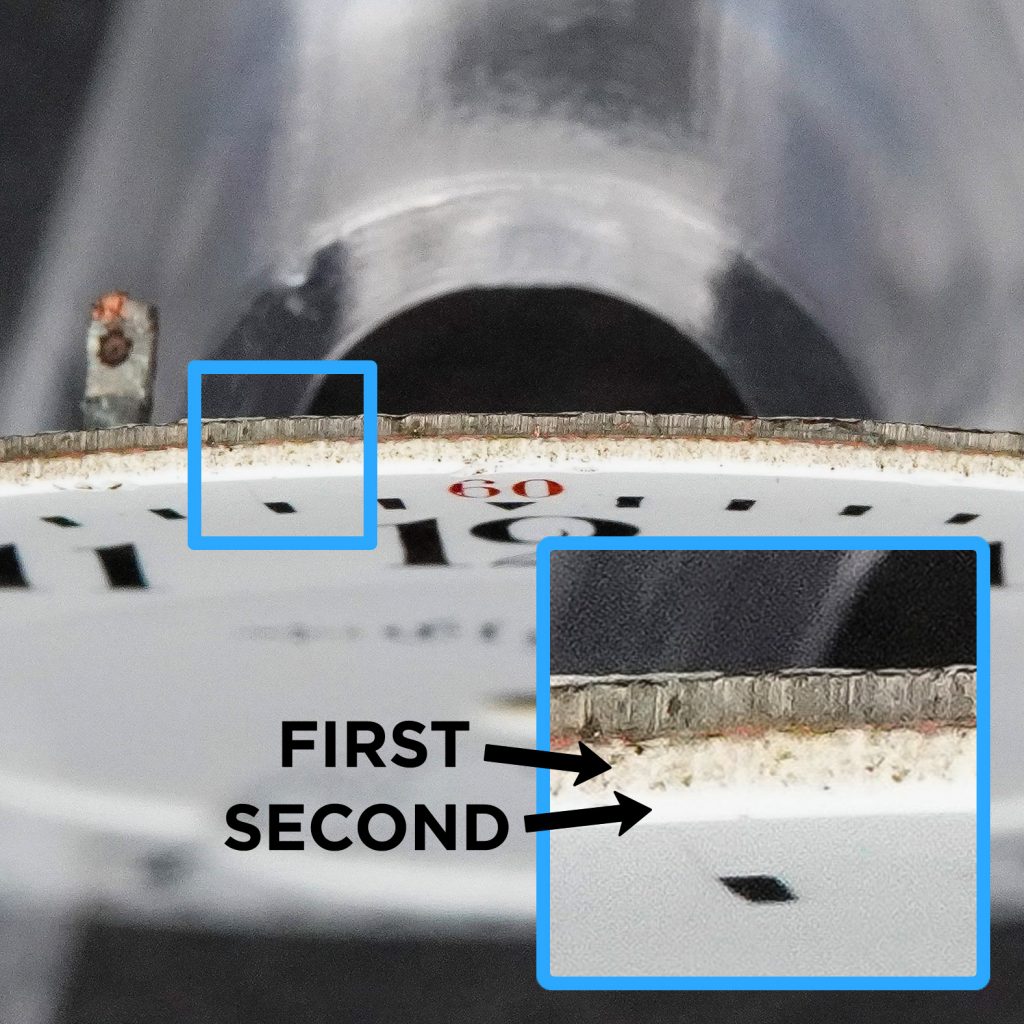
showcasing the two layers of glass (soft) enamel applied to the front of the dial.
The process of making glass enamel dials is tedious and requires sufficiently advanced acumen.
Similar to the hard enameling process, copper blanks are first formed using a brass die. During this process, the center hole is provisioned, the edges are turned up, and the dial feet are attached.
The soft enamel material used for glass enamel dials is delivered to the factory in small cakes, typically measuring approximately six inches in diameter. The enamel is broken with a hammer and coarsely ground and mixed with water using a mortar.. A thin layer of enamel paste is spread over the back of the copper with the end of a quill or small bone spoon. After a cloth is used to extract some of the moisture from the enamel paste, the surface is smoothed with a steel spatula.
Once the backs are prepared, a thin layer of glass enamel is applied to the front, called the first coat. Again, the water is extracted from the paste by dabbing with a cloth, and the enamel is smoothed with a spatula.
After the moisture has been evaporated completely from the enamel paste, the coppers are fired beneath a muffle until the enamel is sufficiently melted.
A second layer of enamel paste is then applied to the front of each dial, gently smoothed and blotted. The moisture is evaporated, and the dial is fired once again.
During the second firing, the dials must be cautiously observed and gently coddled to prevent the enamel from melting too rapidly.
Once the second firing is complete, the fine surface is ground and polished with a process called “using off” to create a more uniform appearance. The dial is then finished in a final fire, using intense heat to create the high-gloss surface.
The accompanying image showcases the edge of a glass enamel dial from the Elgin factory, clearly exhibiting the distinct layers of enamel applied to the front of the dial.


